Video: Open Studios Sneak Peek!

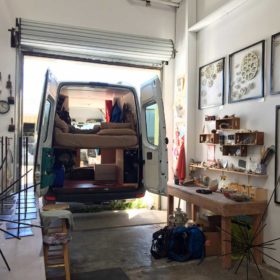
I’ve been getting the studio ready for Open Studios, so here’s a teaser video of what’s in store for you! Can’t wait to see you at the studio this weekend!


October 7, 8, 21  & 22 | 11 – 5 (or by appointment)
2523 C Mission St | Santa Cruz
Artist #17 in the catalog

Tedious Tasks

Sometimes you start something that you know is crazy tedious and will drive you insane to make and it may not even survive the kiln process but you try it anyways…
Tedious Tasks | the dirt | Jenni Ward ceramic sculpture

I am making some progress but I find that staring at the tiny wires and carefully placing them actually makes me bit nauseous… so I’m only doing a few per day. It will be interesting to see when it’s completed if the clay and wire version has that same fuzzy glow that a real dandelion does. Will keep you posted as it progresses…

Work in Progress: Umbels Update

Work In Progress: Umbels Update | the dirt | Jenni Ward ceramic sculpture

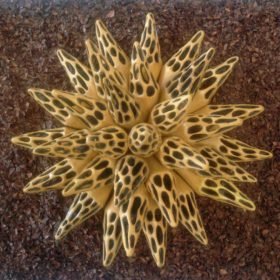
The Umbel Series project is in the final stretch! After hours of building and glazing, 200 of these crazy abstract flowers have become an army of spiky saffron yellow forms in my studio. The photo above shows each of the stages that these pieces have gone through, from left to right; dry clay, bisque fired, tips glazed with bright yellow, the whole piece glazed with a saffron yellow and the final product after the glaze firing.

Work In Progress: Umbels Update | the dirt | Jenni Ward ceramic sculpture

Ceramic Umbel flowers as far as the eye can see in my studio! It has become quite a production line to make these happen but I think the installation will be fantastic!

Work In Progress: Umbels Update | the dirt | Jenni Ward ceramic sculpture

Starting your day by opening a kiln full of bright yellow can really get you moving in the morning! Today we’ll be taking a few of them up to the UCSC Arboretum to test out the installation locations. The opening for this exhibit will be in late May, after that we’ll have a day for visitors to come and ‘pick their flowers’ so you can plant them in your own garden space.

Click here to learn more about this project…

Video: Packing for NCECA

Packing up the 200 pieces from my Hive Series to ship off to Portland is no small feat. Each piece is wrapped in bubble wrap, those pieces are boxed up, the boxes are crated up and the crate will get picked up and shipped off soon. Fingers crossed everything survives the journey. Can’t wait to see this piece installed as a part of The Evocative Garden NCECA 2017 exhibit at the Disjecta Contemporary Art Center.

Video: Carving Hive Series

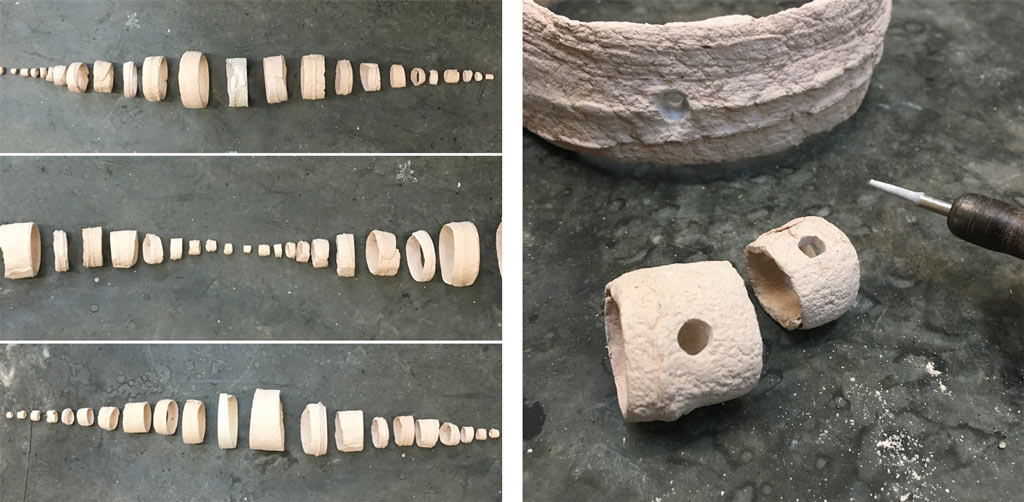
I’m making a few extra pieces for my Hive Series installation which will be exhibited at the Disjecta Contemporary Art Center in Portland for NCECA 2017. There are about 200 pieces that make up this installation but just in case some don’t survive the shipping, I thought a few extra would be a good idea. Here’s a quick video of the carving process to make the ends have a web-like structural feel to them. It’s the most time consuming part of the whole process, but the results are pretty beautiful! Enjoy…

Prepping for an installation

When you work in parts to make multipart installations, it’s easy for things to get mixed up. Whether it’s in the kiln or in the glazing process, it’s very easy to confuse yourself on where you planned for everything to go. This is especially true when you are doing an installation in a gallery space, a time when you want to be organized and intentional with your work. This is especially hard when you’ve never installed the piece in its entirety yet. This uncertainty is also what I love about installations, a sort of do or die moment when you may have to improvise to make it all happen the way you want.

Prepping for an installation | the dirt | Jenni Ward ceramic sculpture

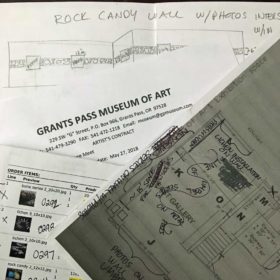
Here’s a glimpse into how I keep things organized. I am a huge fan of the paper template. I plan out everything on a very large piece of paper and usually do as much layout as I can on the floor in my studio. Once I’m happy with the layout, then I decide which pieces go where. Each piece is identified by a number that corresponds to it’s spot on the paper template.

Prepping for an installation | the dirt | Jenni Ward ceramic sculpture

When I get to the space, the paper template gets hung up first. This is a really simple way for me to envision how the piece will actually work in the space and it’s easy to move around if I decide that the original plan doesn’t work. Once I’m happy with the placement, then I start attaching the hardware, usually screws or hooks that will hold the pieces to the structure. I remove the paper template as I start attaching the pieces.

Prepping for an installation | the dirt | Jenni Ward ceramic sculpture

In the case of having multiple parts in a multi piece installation, as in my Lichen Series or Vine Series, then I use a layout map with measurements of each of the pieces, so that they are composed to interact with each other while still holding their own in the space they occupy. This is especially important to keep the flow of a piece visually stimulating, again, I usually do as much layout as I can on my studio floor before making final decisions on the layout.

The Lichen Series has 9 stalks each with 9 parts to it, it can get a little confusing, so each piece is labeled and boxed to correspond to the map. The Vine Series has 9 vines total each with 36 parts and as similar as they are, the parts are not interchangeable between each vine so it’s important that everything stays organized.

Prepping for an installation | the dirt | Jenni Ward ceramic sculpture

I also find that this is a really helpful system if you are not the one installing your own art. I try to imagine the handling team at a gallery or museum unpacking my art and seeing it for the first time in person. Putting yourself in their shoes makes you pay attention to the details that come as second nature to the artist. Explaining and labeling are the keys to making sure your art shines. I’m sure that other artists have different ways of planning out a multipart installation which I’d love to hear about, so please share if you’ve got a great system!

BUY ART

BUY ART | the dirt | Jenni Ward ceramic sculptureThere is a notion that buying art is only for the elite, those with large enough spaces to house art and that you must be educated in the field in order to make good purchases. All of that is wrong. One of the best lessons I learned wine tasting is that it doesn’t matter what the bottle costs or whose top ten list it’s on. What matters is that I like the way it tastes. Duh, right?

The same applies to art. If you like it, you like it. Maybe you can go deeper into figuring out why you like it, whether it’s an emotional connection to a piece or a connection to the material it’s made out of. Whatever the reason, if you connect with a piece you want to surround yourself with it, just like a wine you enjoy can round out a meal, a piece of art can round out your space.

Maybe you can’t afford the piece you connect with or you don’t have a wall big enough to hang it on, this happens to me all the time, but the good thing is that most artists make work in a variety of size and price ranges which can make taking home a piece of their work affordable to nearly everyone.

You are of course welcome to just come and look but for my Open Studios event this year, I have work priced from $15. and up, affordable for every budget. Thanks for supporting independent artists and buying art!

Doing it all yourself…

Everyone assumes that because you are an artist, you can make anything yourself and maybe we can but do we actually have the time to?

I could make all of our dishes, all the tiles for the floors and counters, and even design logos and signs for my business. They wouldn’t be the best, but I have the skills, tools and materials to do it. But this means that every time I put effort into a creative project like tiling the countertop means that I take away time from making art, so how do you find a balance between the things you can do and the things you should do?

This countertop project was a real thing, I really wanted to make the tiles to mosaic the new studio counter and when I mentioned that to my husband who had just finish building the countertop, his response was, “Do you want to use this surface area in the next few months?” He was joking but he definitely had a point. I need to use the counter in a few weeks when my classes begin again at the studio, so a few coats of polyurethane and a few hours later the countertop was ready to go. Maybe someday in the future I will make the tiles, dry them slow and flat, fire and glaze them, then design the whole surface of the counter into an elaborate mosaic. Maybe.

Doing it all yourself... | the dirt | Jenni Ward ceramic sculpture

But for now, I’ve settled on making my own numbers for the studio address and I’ve hand painted signs that will hang on the outside of the studio, these things still took hours but not weeks. And I’ve got no plans to make all my own dishes, I will leave that to the much more talented potters that abound in my community. I want my studio to have creative, handmade touches that make the space unique and intriguing for visitors but I also want to have a body of work that I’m proud of and has been given the thoughtful attention and time it deserves.

So with that, I’m going to stop blogging and start working.