
I went through nearly 100lbs of clay making ring forms that will eventually be assembled into a sculpture. By throwing the clay on the floor, it stretches it and gives it amazing texture. I’m using a paper clay for this because it has enough strength to stretch to 4′ lengths without tearing. I used to make sculptures about 20 years ago using this stretching technique, kind of fun to return to it again and looking forward to seeing where it goes…
Tag: Life In The Studio
New Video: Taking Down the Vines
A few of these Vines have found a new home! Had to get up on the big ladder today to take them down, get them cleaned and packed up. I can’t wait to see what they will look like installed in there new home!
Selling AND Buying Art at Open Studios
I was so fortunate to have many pieces of art find new happy homes during Open Studios Art Tour this year. Thank you so much to all of you who put your money where you mouth is and supported your local artists!
 When you are a participating artist in the tour it’s really hard to make your way around to see other artists studios but this year, my husband and I were able to sneak in a few studio visits one afternoon. While we don’t have the biggest budget to buy art, let alone the space to put it in, we also believe in supporting local artists. So many people think that art is out of their price range so I wanted to share the gems that we bought, all for under $200. Seriously. Under $200.
The koi fish and coral original painting was done by muralist Elijah Pfotenhauer, the rabbit print was done by muralist Taylor Reinhold and the small bowl was done by ceramic artist Liz Crain. I love the color and energy that each of these pieces add to my collection of local and global artists.
What did you collect this year at Open Studios?
Video: Open Studios Sneak Peek!
I’ve been getting the studio ready for Open Studios, so here’s a teaser video of what’s in store for you! Can’t wait to see you at the studio this weekend!
October 7, 8, 21 & 22 | 11 – 5 (or by appointment)
2523 C Mission St | Santa Cruz
Artist #17 in the catalog
Video: Umbel Series | Dandelion Time Lapse
Tedious Tasks
Sometimes you start something that you know is crazy tedious and will drive you insane to make and it may not even survive the kiln process but you try it anyways…
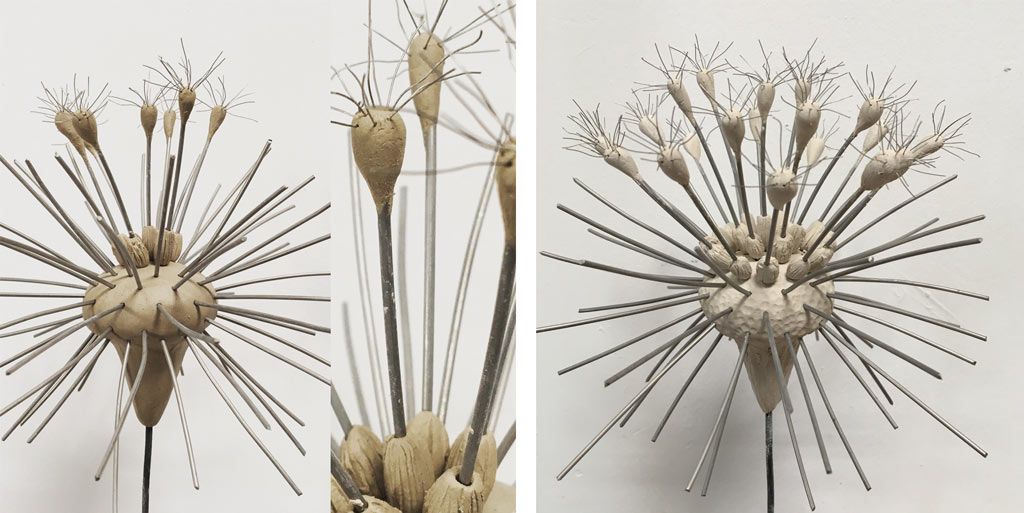
I am making some progress but I find that staring at the tiny wires and carefully placing them actually makes me bit nauseous… so I’m only doing a few per day. It will be interesting to see when it’s completed if the clay and wire version has that same fuzzy glow that a real dandelion does. Will keep you posted as it progresses…
Work in Progress: Umbels Update
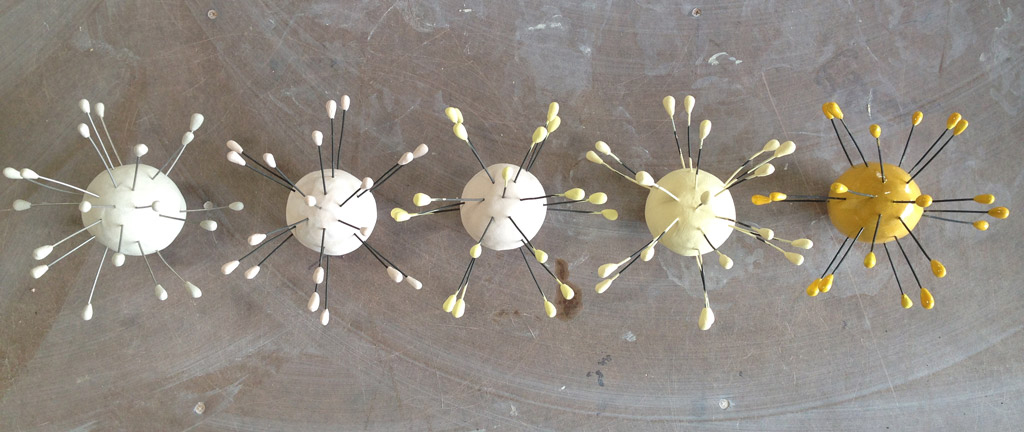
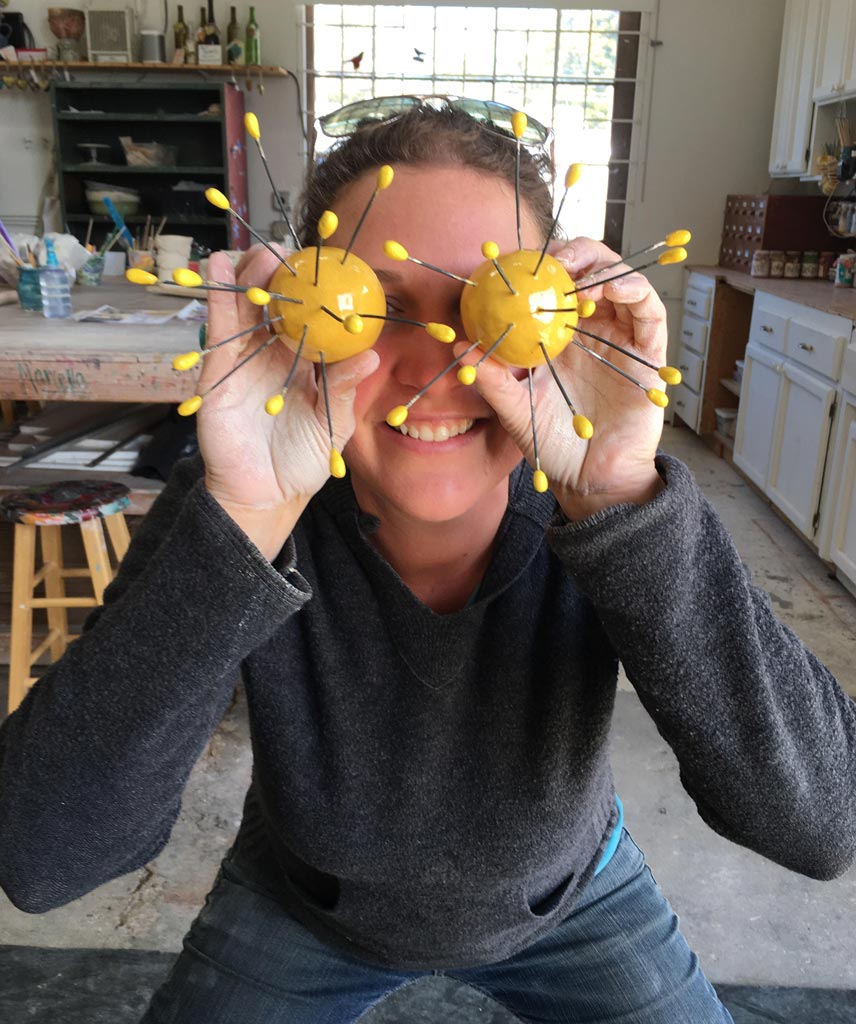
The Umbel Series project is in the final stretch! After hours of building and glazing, 200 of these crazy abstract flowers have become an army of spiky saffron yellow forms in my studio. The photo above shows each of the stages that these pieces have gone through, from left to right; dry clay, bisque fired, tips glazed with bright yellow, the whole piece glazed with a saffron yellow and the final product after the glaze firing.
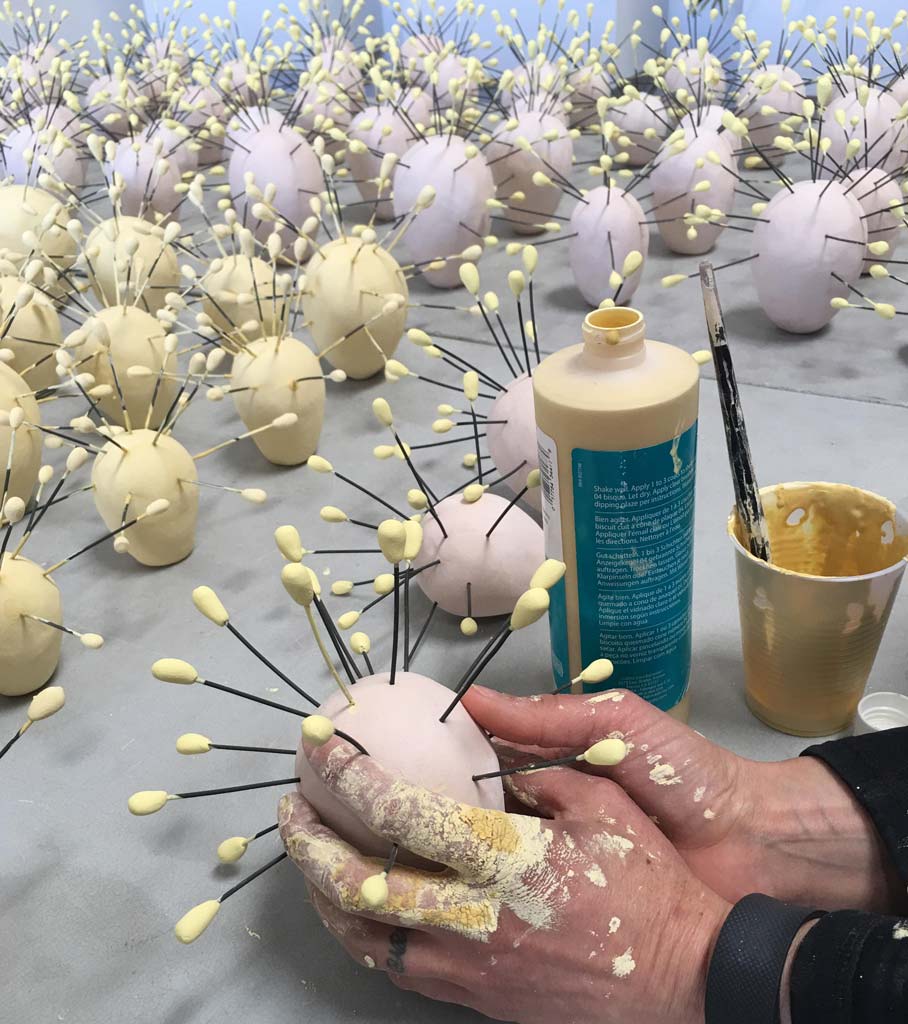
Ceramic Umbel flowers as far as the eye can see in my studio! It has become quite a production line to make these happen but I think the installation will be fantastic!
Starting your day by opening a kiln full of bright yellow can really get you moving in the morning! Today we’ll be taking a few of them up to the UCSC Arboretum to test out the installation locations. The opening for this exhibit will be in late May, after that we’ll have a day for visitors to come and ‘pick their flowers’ so you can plant them in your own garden space.
Video: Umbel Series | Work in Progress
Here’s a quick video showing assembling the pieces from my Umbel Series. This piece will be exhibited at the UCSC Arboretum as a part of the Art at the Arboretum “Site Specific Environmental Installations” this spring. To learn more about this installation…
Video: Packing for NCECA
Packing up the 200 pieces from my Hive Series to ship off to Portland is no small feat. Each piece is wrapped in bubble wrap, those pieces are boxed up, the boxes are crated up and the crate will get picked up and shipped off soon. Fingers crossed everything survives the journey. Can’t wait to see this piece installed as a part of The Evocative Garden NCECA 2017 exhibit at the Disjecta Contemporary Art Center.
Video: Carving Hive Series
I’m making a few extra pieces for my Hive Series installation which will be exhibited at the Disjecta Contemporary Art Center in Portland for NCECA 2017. There are about 200 pieces that make up this installation but just in case some don’t survive the shipping, I thought a few extra would be a good idea. Here’s a quick video of the carving process to make the ends have a web-like structural feel to them. It’s the most time consuming part of the whole process, but the results are pretty beautiful! Enjoy…